Wednesday 21 October 2009

Completing the face: Ear, Mapping, Animation

Once I had imported the ear into the main scene with the head, I placed the ear in the correct position and attached it to the face. It would not Weld, but as it "clips" the face slightly it looks like part of the object. I have also tweaked the nose and improved the eye texture:


Next up was UVW Mapping. This was achieved by adding an Unwrap modifier to the original half of the head. Following the tutorial, I created a cylindrical map around the face which gave me the following map:


However, this only applied to one half of the face so I created another Unwrap modifier above the Symmetry modifier. This created a map with two overlapping faces:

(second face moved for illustration purposes)

As can be seen, the two sides of the face are overlapping which is not good. I selected the mirrored side of the 3D face using Polygon selection, which allowed me to flip the texture map for this side of the face horizontally. I then resized both sides of the map to fit within one image and created the following UVW Map:


To apply my face to the map, I used a segment from the map I had created previously in this project for the main face section. This only needed minimal tweaking. For the rest of the map's skin texture, I used a mixture of the Clone stamp, Smudge tool and copy and pasting tiled sections of skin from the face. To apply the hair, I used hair from my reference image and inserted it in the correct place to create my face map. The ear texture was also reapplied on the ears in the new map:


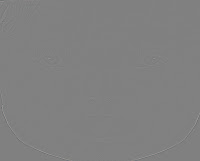
The next step was Bump mapping and the addition of Noise. This was done using the process described earlier in this blog with the High pass filter in Photoshop.


After this was specular mapping, a new stage. I followed the tutorial for creating this map (using the Lighten tool on a darkened bump map to bring out the "shine) and applied it as Specular map in Max:


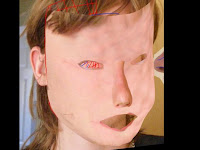
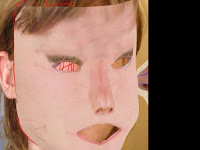
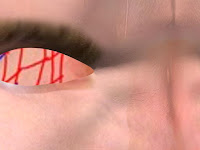
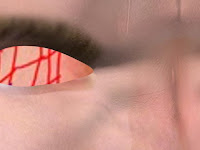
As can be seen, I have added some spheres in the skull with a red skin texture on to fill the gaps between the eyes and the outside of the face. Although it does not look completely like the corner of the eye, it is better than black space.


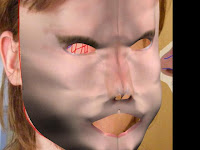
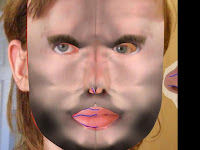
With the maps applied to the face, it was complete! Images below are in this order: final render - unsmoothed mesh - NURBS mesh - symmetrical TurboSmoothed mesh.


The final step was some animation to the eyelids to give the face some life:


The aspects I feel could use improvement are the nose which requires more detail; the ear which could use more complex geometry; and the eyes which do not completely fill the gap. Also, the texture map is not perfect above the eyes where it meets the hair. The texture also pinches towards the centre at the very top of the head. I am not sure if this is due to the map I used or the cylindrical mapping technique. Overall, I am happy with my face given the limited time in which to create it. Organic modelling was a whole new area to me at the start of this module, and I am proud of how much my ability has improved in these 5 weeks. I now feel more confident about complex modelling in Max.

Sunday 18 October 2009

Making an Ear

To create the ear, I initially tried building it piece-by-piece. Once I had done the outside of the ear, I realised that it was full of triangles and was not giving good results:


Going back to the drawing board, I used the same technique as creating the face mask. With a reference image in the background, I drew topology splines in Max then moved the vertices to match the topology of the ear:


The geometry is quite simple, but it follows the basic structure- the ear has a raised area around the edge, dips inwards then goes in again towards the centre. I then created a Planar UVW Map using the UVW Unwrap modifier:


I then applied a photo of my ear to the map, which matches the geometry closely:


This gave me a textured model of my ear which I could export as a 3DS ready to be attached to the face:

Friday 16 October 2009

UVW Map problems?


So, you have your model with a UVW Map (pretty much) all done but notice a vertex or 2 which need moving. You move the vertex, and end up with:


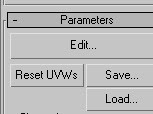
And so you re-create your UVW Map only to notice something else is out of place. Rinse and repeat. To prevent this, before you move a vertex, you can save your UVW Map:


Now move your vertex and watch that horrible tiling reappear. No worries, though:


Simply load your UVW Map and your texture will be reapplied correctly! Good times.

(This worked for me but it doesn't work all the time, if you delete vertices etc the map still has to be re-done...)

Tuesday 13 October 2009

Building a head


The video above shows a draft model of my head.

The skull was created by placing a sphere behind the mask and scaling it to fit the edges. I then made it an editable poly and removed one half as Symmetry would be applied later on. I then removed bottom half of the sphere. By holding shift and dragging the bottom edges, I could extend them to build the back of the head. Cutting the faces was helpful when new smaller faces were required. To join this to the face mask, I used the Attach tool which then allowed me to weld the new vertices to those of the mask. The result was this:


The next step was to make the back of the head more human instead of a flat drop. This was achieved by cutting the large faces into smaller segments which were shaped to create a natural shape:


However, the front of the neck was more troublesome. I created a cylinder primitive and scaled it to fit the head then removed three quarters of it:


I then Attached the cylinder to the rest of the head, as can be seen here there is serious clipping as none of the cylinder's vertices are welded to the head:


The next step was to Weld the vertices of the cylinder to that of the face mask and the back of the neck. This was a time consuming job as the cylinder's faces had to be cut and new faces created to suit the shape of the mask.


I then applied Symmetry and sculpted the sides of the neck to provide a less circular shape. Finally, NURBS smoothing was added to produce this result as seen in the video:


There is still pinching which needs fixing and the nose still needs tweaking. I have built ears, which will be applied. Also, the UVW Map for the entire head needs to be created.

Thursday 8 October 2009

Model Improvements: Now 100% more human

When the face was textured and lit, two issues became apparent: The cat-like puffy lower cheeks and protruding lips. These have been fixed and the chin has also been brought more in line with my profile.


I think this is a massive improvement and leaves me free to focus on the other parts of the model.

Now with added eyelids!

With the lips fixed (no sticking out unwelded polys or horrible texture tiling)...


...I decided to put in some rudimentary eyes and begin modelling the eyelids.


These were made the same way as the lips, dragging out edges with the shift key to create new quads. Once this was all modelled and welded, I decided to try animating them:


With better lighting, it is apparent the cheeks come out too far at the bottom of the face and the area around the top lip is a bit too pronounced, so the next step is to improve the model. After this I will add better eyes and nose, animate the lips and finally model the ear and back of head. Or I may do specular mapping and tidy the texture map next. Who knows?

Lips!

I started on the lips today, initially trying to create a whole new model using Splines- which didn't turn out to well and would have been a nightmare to merge with the face:


I decided to follow the tutorial's way by selecting the edges of the mouth on the existing face, holding shift and dragging to create a lips shape. After welding the vertices of the new shapes together, this is what I came up with:


The texture mapping needs some work, but this could be due to certain vertices not being welded together. I could also create more edges going inwards to add depth.

Wednesday 7 October 2009

Break from modelling: UVW Mapping

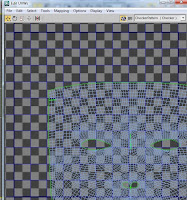
After fixing the issues mentioned in the previous post (and removing a lot of those evil triangles along the way) and struggling with modelling the head and lips, I decided to try texturing the face "mask". To start this, I applied an Unwrap UVW modifier to my face.


I could then click Edit to adjust the UVW Map.


Below is the image I was presented with, which did not make much sense.


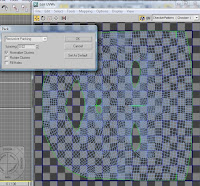
Using help from a tutorial (http://waylon-art.com/uvw_tutorial/uvwtut_01.html), I selected "Pack UVW" to fit the map in a box.


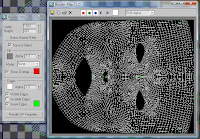
I could then render the UVW Map to an image for editing.


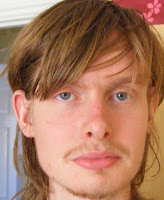
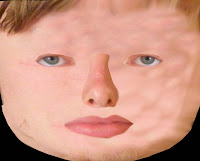
Once I had the UVW Map open in Photoshop, I began editing this photo to fit the mesh. Firstly, I painted over all my facial features such as nose/eyes/lips then pasted them back on in positions which corresponded with the features on the map. Below is the original photo and the initial texture map for my face.


After placing this image on my face (rotating it 90 degrees so it was oriented correctly), a few issues became apparent. I had placed a non symmetrical map on a symmetrical face, which led to an uneven texture around the facial features. Also, the right side of the face lacked detail as it had been painted across from the left.


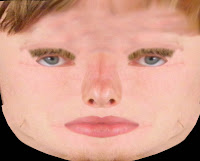
I went back to my map in Photoshop, added some eyebrows using the clone stamp and mirrored the left side of the face below the forehead onto the right as well. This gave a symmetrical face.


The next step was to apply a bump map to the face to give the detail some depth. To do this, in Photoshop I applied a High Pass filter to create the following image:


This image was then applied to the "mask" as a bump map. However, the bumps were defined too harshly:


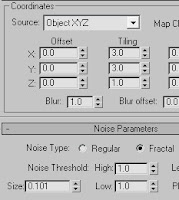
I fixed this by turning my diffuse map into a "Mix" map containing my face texture and a "Fractal" noise map. To make this look "right", the mix amount as well as the tiling and size of the noise was altered.


As can be seen below, this softens the bump map...


...As well as providing extra detail to avoid pixellation when the camera is zoomed in:


Below is the current progress of my face. Although the lighting isn't brilliant and there is an obvious seam down the middle of the texture as well eyebrows which are too low (which need fixing), I'm pleased with the progress. Now, onto the ears, eyelids and lips...


After this, I created some eyeballs out of basic spheres and created a texture map to wrap around them.